Wednesday, May 18, 2011
Final Drawing

It is also a good idea when you think you’ve finished or are getting near the end of a drawing to try looking at it in many ways. Getting the perspective of your picture in different light is a huge thing. Going from my dorm room to the class room made a world of difference. Not for the better. I am going to re-do my self portrait before I put it in my portfolio. That’s why it’s not in here. I thought I was getting better at drawing and started it a buuuuunch of times. Too bad it didn’t look like me.
A lesson I learned for drawings I do after this: always write the date on them! I forget what drawings I’ve done when and they’re all blending together. Some of them I remembered to date and write the amount of time in class we got to do them. Now I just need to remember to do it for all of them.
It was kind of sad to just leave Oliver behind in the classroom. After spending an entire semester together working hard on him, my creation is complete. I guess the next person who makes a manikin out of the same one I had will be kind of like a reincarnation of Ollie. What funny little things, those manikins. I thought it was really funny to see everyone’s standing together like a skeleton army. It even has a leader. Hmm.
May 2-6 – skull


The skull. Dun dun dun. Most beginner drawers, especially children start the body by drawing the head. Furthermore, they draw a big ol’ circle. It’s the right way to start, but now at a college level we know it is more complex than a simple sphere. We also know you should start with the ribcage and work your way around the body to the hips, legs, shoulders, arms, then the head.
I was pretty satisfied with my drawing of Rob on Friday. I realized that I work better if I don’t think super hard about the pose right away. The final product is more successful if I start by quickly sketching what I see (gesture drawing style) then going in with the exact angles and details. It’s easy to use vine charcoal when doing gesture drawings because going that quickly, you do not have to pull out an eraser each time you make a mistake, just swipe it away with your hand.
On this drawing, that’s what I did with the head and it ended up being almost the exact right size. I actually don’t think Amy looked at it to critique it. At first his hair kind of looked like a helmet on his head, but I thought about how hair is kind of a helmet to protect our head or at least keep the heat in. When I stepped back and focused on the body as a whole it did not look helmet like. That made me glad and so I left it.
I am also happy with the way his arms turned out. They are proportional to the rest of his body and his elbow hits at the right spot on his side. I did not make his hand just a regular ball or sausage fingers, but carefully arched the start of his fingers and kind of squared them off. I’d call it a success.
Eye


With the eye we learned it is crucial to remember it is a globe shape. It can easily be forgotten and drawn as an oval right away. There are three plane changes at the top of the eye and two on the bottom. When drawing Annie, at first I didn’t put in enough of the upper lid and Amy showed me how it should go. After putting in the line of the lid that covers part of the eye ball, the same shape is used to make the back line of the lid. The upper lid overlaps the bottom lid which is especially apparent at the corners. During our class, it is not necessary to draw in the eyelashes because they are distracting if you draw each individual one. It is fine to draw in the shape of the outer one on the top lid used as more of a shadow rather than a lash.
From the side, the eyeball is circular with a partial sphere where the cornea, iris, and pupil are located. In our drawings, we did not need to focus hardcore on the iris and pupil, just as long as the circular shape of the cornea was present.
The shadows on the eye ball can be compared to the earth and sun. The highlight on the eye follows the round direction of the lid. There is also a shadow below the eye where the hollow hole of the skeleton is underneath. When drawing, it is helpful to make landmarks on the face like where the plane changes are from the eye to cheekbone as well as the shape of the bottom of the cheek. Amy explained how the eye is in further than any of the rest of the face and to be sure we did not draw it sticking out. It may seem like a given, but it’s not, so it was a good point to make. After the shape of the eye is in place, you can easily follow the shape of the triangle at the top of the nose to lead into the brow. Similar to the lashes, it is not necessary to draw the eyebrows as hairs, rather a line indicating they exist.
April 25-29 – nose & lips


I will never look at another nose the same again. There are so many complex parts that I had never analyzed so closely before. There are many plane changes that you have to look carefully on each individual person because no nose is the same. Nostrils are particularly odd when you really think about them. Amy brought up a good point that instead of drawing an entire shape shape (like a sphere or a circle) as the nostrils, rather it looks better to draw a few not connected lines. It makes it much more realistic looking. I thought it was funny she made sure to tell us not to draw it looking like a pig.
In our lesson from Amy we learned the nostril stays on the bottom plane, which is usually shaded. Under the nose is the Philtrum or “love filter.” She said that’s probably her favorite part of the body and I would have to agree. It is underrated. It is often overlooked as people examine the facial features of another person. They usually focus on the eyes or smile passing right over the Philtrum.
Before, I never realized that each nose takes a downfall at the top near the eyes where it switches from bone to cartilage. Then following it upwards, a triangle shape makes up the area between the eyes. At the tip of each nose is a small sphere shape. This varies greatly from person to person. Both the size and whether the nose points up or down is unique to each individual. Analyzing features of the face this much makes me think about genetics and how interesting it is that we get genetics from our parents that make us look the way we do.
Sometimes when I would draw a nose, I couldn’t see both side planes of it, but resorted to the “draw what you know” tactic. Otherwise it looks a bit unfinished if you leave it totally off so putting just a hint of the shape helps it look more realistic. It is important to define the top plane because it makes the nose seem three dimensional standing off of the face. I sometimes find it hard to make my drawings look life like. Getting the right shapes is tricky too. I find it easiest to hold a pencil out in front of you and use it as an angle reference. I had not learned that technique until this year and it works super!
The upper lip is darker than the bottom lip because the lower lip faces up towards light. Both lips have a different thickness to them. The darkest point is the line between the lips and if you make the outsides too dark you will get the feeling of an unwanted expression. In resting stage, the lips curve downwards and some curl back up again at the edges. There is a very thin highlight above the top lip.
Feet


I have found feet a difficult part for me to draw accurately. During gesture drawings, we did not have to add them in as full shapes, rather lines to show they existed. This was great base work for fully adding them in later.
With feet, we learned about the plane changes and I found it helpful to draw contour lines indicating where these plane changes are. The next time I draw a foot I will put more value on it. Also, be sure to make the toes more square shaped to distinctively show the plane changes. In my opinion, adding feet to a human standing adds a lot to the drawing. It gives the sense of stability and that the figure is grounded.
About April 11 –Hand Skeleton

The skeleton of the hand is one of my favorite parts of the body. The different sections each have a different shape and they work together to accomplish crazy tasks. Tasks such as drawing, flossing, writing, holding a baby, eating are all very important things to be able to do. I liked how by looking at the skeleton we could see the exact shape of the bones. You don’t get that with the human hand. The shapes are unique and before this class, I never thought about how each section of bone is shaped a bit like an elongated figure eight.
The skeleton hand reminds me of my sister’s hands. In a good way, though. It comes from my grandma, they’re hands meant for piano playing kind of. My fingers are long too, but not as long as hers.
Amy helped me out by telling me to be sure to make the plane changes clear. It may seem a big blocky when you’re first drawing, but then if you stand back and examine it, it looks very realistic. Plus, if you add in some light shading to the sides, you can clearly see the difference.
It was nice that in the room there were individual bones of the hand we could look at as a reference. Being able to hold it and turn it around in your hand up close to see the plane changes helped a lot.
It would be interesting to look at the skeleton paws of say, a poodle and compare/ contrast the bones to that of a human. Even between a baboon and a human. They’re probably very similar. You have to wonder if gorilla hands with their big old sausage fingers have bigger bones than us.
How our hands grow from when we are babies is an interesting thought. I love baby hands they’re so chubby and cute. What tiny bones they must have. That makes me think of x-ray machines and how advanced technology is getting.
April 18-22 - Real hand

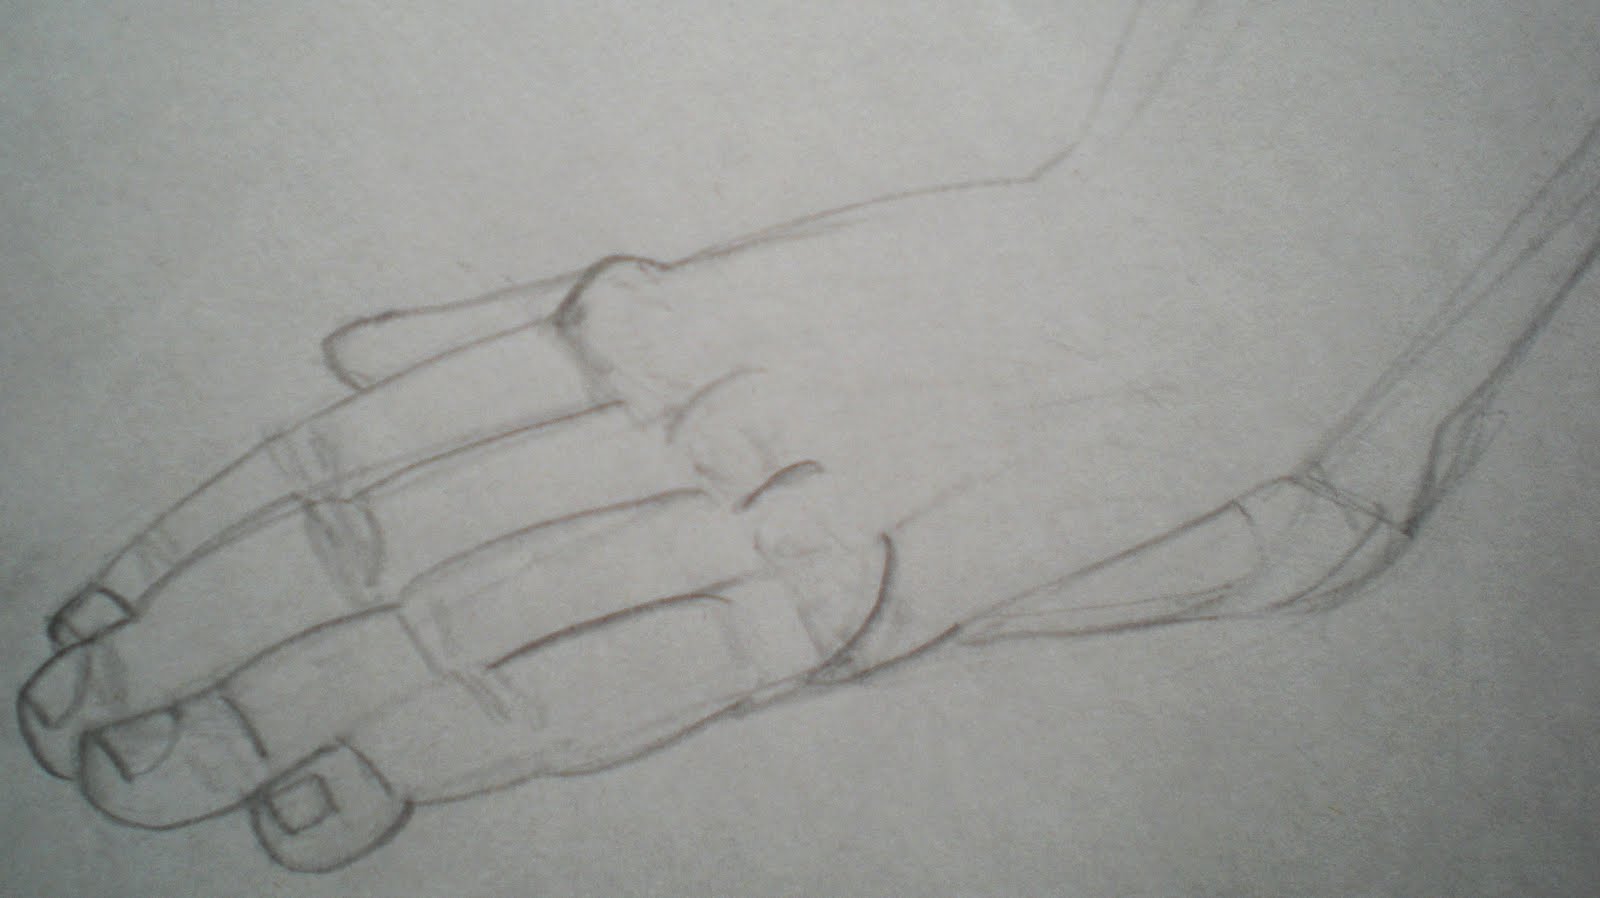
The first drawing of the hand I did looked like a robot hand instead of a human hand. I knew something was wrong with the fingers connecting, but had to ask Joelle, my neighbor, why she thought it looked like the hand of Optimus Prime. Once she showed me Amy’s example on the board had all of the fingers connecting more to a point near the wrist, I got it. The first day of drawing hands was not the most successful for me, but I kept trying and have gotten better at least.
This hand’s fingers might be a little long compared to the palm, but I blame Rob. ;) Just kidding! The models are great. Since his fingers were closer to me, I had tried to make the point of view relevant. I’ll keep working on hands.
I find it interesting that looking at a skeleton, the tips of the fingers are so pointy. Especially typing this up right now I can picture the bones tapping away on the keyboard. Kind of eerie... Halloween like. Next year I would like to have a little skeleton in my room for Halloween. Then I can remember all the parts from drawing! Although the fingers are so pointy, tendons and muscles in your fingers make the tips little pads.
Putting these hand tendons on our manikin sure was a lot of fun. Well, maybe not described as fun, but they are very thin pieces so rolling them out was kind of like Play-Doh snakes. Babysitting we used to do play-doh ALL the time! My mom even let us make homemade Play-Doh when we were little girls. Anyways, we rolled them out and the fingers have two layers of them. They connect all the way up the lower arm too. I had a little bit of trouble telling exactly where the book was saying the tendons go up to connect to the arm. Our books can be confusing so good thing Amy knows so much about the tendon locations!
March 28-April 1 – Sitting in Chair


We focused on the arms one class this week. It’s easy to get caught up in the idea of starting with the arms since that was the main focus of the lesson. I had to make sure to remember to start off by drawing the rib cage, then the legs, shoulders, then finally the arms. The muscles making up both sections on the arms surprised me a little. I didn’t think about how many overlap each other or how many muscles it really takes to reach for an object. It was especially apparent when doing the Manniken. I was debating whether or not to make the biceps body builder status, but decided against it because the arms would look foreign compared to the rest of the body and wouldn’t match up size wise. Maybe if someone had an unlimited amount of clay they could do that. I’m glad we don’t have to feed our manniken’s. I feel like Oliver would have a hearty appetite.
Arms really are a huge part of our daily lives. (Then again I don’t think you can say any part of the body is insignificant. They all play a huge role every day.) The fact that these things that seem like branches coming out of us can hold all of our weight to do a push-up or pull-up is so interesting.
Drawing proportions has become so much better for me! If you really just stop to take the time to look and analyze each piece in relation to the surrounding parts, it all fits together like a puzzle. The human body like a puzzle. I’ve never thought of that analogy before and just realized it really works. There are a bunch of small pieces that look kind of weird and alien like by themselves, but put them all together and what do you got? Bippity boppity boo… a human.
Amy corrected the angle of the elbow on this piece. It was slightly off. Also, I drew her head in lightly since I don’t really know how to get the shape right yet. The more practice, the better ya get!
Saturday, March 5, 2011
Midterm Post!
Midterm?! Didn’t we just start this class like, last week? Man time really does fly when you’re having fun! ;) Now that I’ve taken pictures of my work it’s really cool to see the progress I’ve made over this short amount of time.
One of the first and most important things I’ve learned was when we learned to draw the spine. By intensely focusing on the curvature of the different parts, rather than the spine as one straight vertical line, helps to get the right shape for the rib cage.
It seems like a rather obvious concept, but coming into class I did not consider how the rib cage covers the whole upper part of the body and how far up the upside down “V” shape goes. This makes an enormous difference in the spacing of the rest of the drawing.
A technique this class has helped me develop is holding out a pencil or straight edge and using it to find the angle of any part of the body, really. The twist of the spine, tilt of the pelvis, and curve of the calf are a few that I find myself measuring often.
Although touching the Maniken clay is not one of my favorite things, it has been very interesting to see them develop. Kind of like how babies muscles form over time. Especially after taking extra time to really look at the book and correct them on my Maniken, it is fun to be able to point them out on the model. To be able to identify the key muscles, even if you can’t see them on the model, and draw them in is a nifty skill!
I really like it when we can watch Professor Fichter draw the model. Just in Friday’s class I realized how helpful it is to view other student’s drawings as well. Often times I am uncertain about what or how I’m drawing and it’s reassuring to see how other artists work or interpret the contour lines. It’s a great way to remind us how we should tilt the different parts of the body in our similar drawings. It also reminded me to make sure to use my whole arm in the process of drawing.
As far as my drawing skills, I’ve noticed that although not perfect, I have gotten a lot better at getting a line right the first time. Subconsciously I am becoming able to analyze the figure more quickly to produce a more accurate sketch. Before coming into this class I didn’t realize how much more motion you have if you stand at the easel.
What we have been learning so far is great! I have heard from a few sources that we may draw a self portrait, which would be challenging yet cool. One of my personal goals is to be able to draw a person and have it actually look like who I am drawing. I’m sure that will come with time.
My last post here describes a lot of my pictures, but just to make sure I’ll write a little about the ones uploaded to my Flickr. The reason why I included “Drawing 1,” one of my first pages of 30 second gesture drawings of rib cages, is because it was such a significant foundation. I feel like Professor Fichter really knows what she’s doing in terms of teaching us what order we should add body parts.
In “Drawing 4” I like the feeling of depth with contour lines, even if mine is a big boxy. I find contour lines to be very interesting. With “Drawing 5” I like the shape of the thighs. Even though I didn’t have time to go back and fully correct the turned ribcage.
“Drawing 6” was a longer drawing and I feel like I got a lot closer to the right shape of the ribs. Also, my proportion to the pelvis was pretty close!
I was really happy in “Drawing 8” when Professor Fichter said I almost had the exact angle of the hips. I just have to remember to also tilt the glutes that much! It also made me glad that I had the right idea for the shape of the legs.
“Drawing 9” comes from gesture drawings including the whole leg. Although I should not have included all lines of the leg in all of them, I learned from that and didn’t in the rest. I was happy with the general shape I had going for these.
This picture (also "Drawing 10") is from my last in class 45 minute drawing focusing on the legs. Adding contour lines gave it more volume.

I have really enjoyed Life Drawing so far and am excited to see what we do next!
Friday, March 4, 2011
Midterm Catch Up
This is my catch up blog to make sure I’ve covered everything I was supposed to. First off, I thought it was funny I have a page of spines. I guess it’s still art; the beginning stages of learning. Haha.

Here I have some rib cages added onto spines. Lovely little petal-like figures:

At this time, I was having major difficulties getting the length of the torso right. As you can see, it’s super long. Oops. Plus we weren’t including heads (we never have) so I’m not sure why I drew one…? Hmm.
Side note: I really wish I would have written the date on each of these drawings the day I did them. Just to see the progress from specific days. Oh well. Live & learn. I’ve started dating them since. (They’re quite the gentlemen ;) daha)

Here I began to figure out that the rib cage can have a tilt to it! Before then, I had trouble understanding the tilt of it.

Contour lines! Looking at this piece now, it looks like a robo-person. (Everything in life reminds me of a song.. it’s kinda weird. Kanye’s Robo Cop, anyone? Hip hop/ rap = more up my alley) But contour lines… They show change of plane easily and I like that I can get that feeling out of my drawing. I really like an example Professor Fichter showed us of a wooly mammoth. Or was it an ox? Or a bull? Are ox & bull the same thing? Well whatever it was a beastly creature of some sort that was really cool. I would like to find that image again just to look at it.

Looks like we’ve got ourselves a rib cage here. I think this was on the male model. I am learning so much about my own body in this class and it is really cool. Like okay, this might sound really dumb, but I never really thought about how your rib cage is the ENTIRE part of your upper body. I mean, duh, I have always known where it is. Also how it separates way up high by your breast bone. Starting out in this class I never drew it that high.

This was last class (Wednesday, March 2) the female model. I accidentally made her look like a little chunker, but really she is not. She is very thin.

I think this was a minute gesture drawing also on Wednesday. The rib cage looks chaotic so just pretend it’s the bottom line of that and the top line is a little closer to it, making it more eggy. And the farther away leg is abnormally long, but I got pretty close with the pelvis distance and I was happy with the shape of her thighs. I’m not really sure why because now analyzing it more I realize to anyone else, it really is not that good of a piece. But it’s good for me and that’s what counts.

Model got attitude in this one! Ok I don’t know if you can really see it in this, but you see in orange where Professor Fichter corrected where my leg should go in orange… I HAD it exactly like that!! Then I heard her correct a part on someone else’s so I quick tried to correct it on mine, but turns out I was right the first time! It made me really happy. I would like to go back and correct it more, but no time for that. This pose reminds me of a Greek statue pose and I like it.

Well, that’s 300- oh wait I went over the word amount. Uhh well, at least I have enough. Lo siento.

Monday, February 28, 2011
Skeleton, you are my friend ;)
“Draw what you see” sounds like such a simple concept. Until you stare at it for a while and then reeeeally look at it. Unfortunately (or maybe fortunately) with gesture drawings, we don’t have a lot of time to observe each and every curve and angle of the bones and muscles of the model. Around the time I took drawing one I realized I’m not the best at proportions. I’ve been hoping and waiting for drawing to just sort of… click, but so far it hasn’t & I’m not sure if it ever will.
Just now I wondered if creativity stems from the subconscious. Like dreams or thoughts from your “sleeping” brain. Here come some AP Psych terms from high school trickling into my brain. What a great class.
I feel really behind in art in general & I often times find myself wondering about other artists processes. Maybe if I read some more of other student’s blogs I will find an answer. Supplies is becoming so expensive now a days, but I would really just like someone to tell me what supplies to get to make some masterpiece.
While blogging I often get side tracked by grammar. My grandma, mom, & sisters are seriously like professional when it comes to spelling/grammar/correctness so I try to imitate their skills. It’s amazing what elementary mistakes we, as college kids, make. I’m not by any means saying I have perfect English. I’m decent, but still working on it! Haha.
So I need to turn in my portfolio tomorrow to hopefully get accepted into the art program. That’s what I’ve been working on all afternoon. O yea… then I came to write my essay on here & got distracted by this blogging so I’ll have to get back to that soon.
This week I’ve set goals for myself; the first one to be on time to class every day. Monday morning (the 1st opportunity at this goal) & what happens… late. UGH. I was really mad at myself because my mom even called me this morning to get me up. I don’t know what the heck happens, but when I wake up I’m really confused & don’t think it’s time for school yet. Which leads me to my other goal that will HOPEFULLY help with this: get to bed earlier! I like to get up early & workout. Last year I got super good at that & dang… looking at a picture I have hanging up by my desk here from last year… I was in a lot better shape. : ( It bums me out MAJOR. I partly blame an art major. Hahaha but for real. Not even kidding all my friends have a lot more spare time for working out & such. When I think to switching back to retail or something though, it just doesn’t feel right. I feel like Graphic or Multimedia type of Design is what I should be doing.
Shoot I don’t have a pic of Oliver yet because I’m taking those tomorrow when he can have the black sheet behind him. Too bad I can’t make a toga for him out of a little sheet. He does look slightly Greek, maybe. Wait, that makes no sense. Sometimes I wonder if I should go back & read/ edit/ delete out a bunch of stuff when I type up a blog, but then in my head I’m just like.. whatever. I don’t have time for that. The only people reading this are the ones required to (bahaha sorry you have to put up with this guys!) Or else… well I guess there probably isn’t an or else. So that’s that.
Shoot I don’t have a pic of Oliver yet because I’m taking those tomorrow when he can have the black sheet behind him. Too bad I can’t make a toga for him out of a little sheet. He does look slightly Greek, maybe. Wait, that makes no sense. Sometimes I wonder if I should go back & read/ edit/ delete out a bunch of stuff when I type up a blog, but then in my head I’m just like.. whatever. I don’t have time for that. The only people reading this are the ones required to (bahaha sorry you have to put up with this guys!) Or else… well I guess there probably isn’t an or else. So that’s that.
P.s. 2 more things real quick. First, I’m really nervous about having good enough sketches for the Life Drawing Mid Term. YIKES!!!!! I’m going to actually go look through my Biggie Sketch Pad right nah! Did I ever say that I also want to be a DJ? I want to find a good computer program, preferably free to use. Not garage band or some crap program on this hp. I can NOT WAIT to get a Mac. Mac’s have my heart. But I do kinda like my hp just because it’s been, for the most, part faithful to me. : )
& Second, can I also say that every time I pull Oliver out, I ALWAYS think of the song “Skeleton” by Kate Nash and it gets stuck in my head until I listen to another song. All of her lyrics are a bit... odd? But then again, aren't we all so who am I to judge? I have to admit, I can’t stand the last like, 2 minutes of it, though. Straight up obnoxious.
Subscribe to:
Posts (Atom)